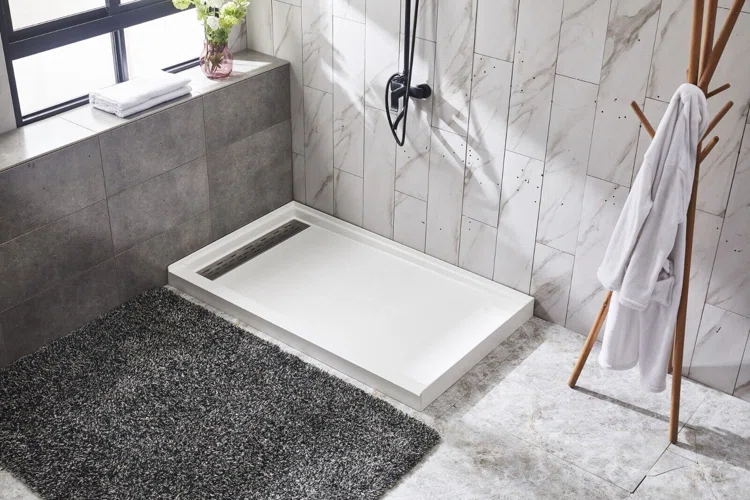
When installing a shower pan, precision is not just important—it is essential. A properly installed shower pan forms the foundation of a functional and waterproof shower space. Without it, you risk water damage, mold growth, slippery floors, and constant maintenance headaches. We have seen firsthand how easy it is for common mistakes to turn a bathroom upgrade into a costly repair project. That's why understanding what not to do during a shower pan installation is just as valuable as knowing what steps to take.
Let’s explore the most critical shower pan installation mistakes to avoid, especially if you're embarking on a bathroom renovation or DIY project. If you're planning a bigger remodel, you might also find our guide on how much to renovate a bathroom insightful.
Not Preparing a Solid and Level Subfloor
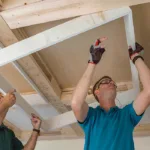
One of the most frequent mistakes made during shower pan installation is skipping the proper evaluation and preparation of the subfloor. A subfloor that is not level or structurally sound can lead to an uneven shower pan, increasing the risk of drainage issues and cracking.
Why this matters:
Shower pans are designed to guide water toward the drain. If the pan rests on an uneven base, water may pool in low areas and potentially seep through edges.
To prevent this issue:
- Use a level to check the subfloor from multiple angles.
- Patch any dips or cracks with a subfloor leveling compound.
- Reinforce weak or rotted areas before starting the installation.
Using the Wrong Type of Shower Pan for the Space
Every shower space is different, and choosing the wrong shower pan can cause friction between design and functionality. Whether it's a too-small base that results in awkward tile cuts or a material that doesn't suit your needs, using the incorrect pan can compromise the long-term integrity of the bathroom.
Common mismatches include:
- Installing a fiberglass pan in a high-traffic family bathroom prone to wear and tear
- Choosing a pan size that doesn’t align with drain locations
- Using a decorative tile-ready pan when waterproofing hasn’t been considered
Pay attention to the shape, size, and drain placement. Always consider long-term durability if you're outfitting a busy household. Customizable options exist—and while they may cost more upfront, the reduced risk of issues later makes them worthwhile.
Poor Drain Alignment
Aligning the shower drain with the pan’s built-in drain hole is critical. Even a minor misalignment can result in leaks or an improperly seated drain.
Key errors include:
- Positioning the pan before confirming existing plumbing aligns
- Rushing the alignment and sealing steps
- Forcing the drain connection, which may damage seals
A leak from a poorly connected drain can go unseen for months, leading to eventual subfloor rot or mold growth. It's wise to dry-fit the pan and use a test plug during installation to check for leaks before applying final sealants.
If you’re already deep into a full bathroom remodel, see how smarter design like bathroom tile ideas that make small spaces shine can influence functional beauty.
Skipping the Mortar Bed (or Doing It Incorrectly)
Installing a shower pan without proper support underneath can be a recipe for long-term failure. A mortar bed provides critical weight distribution and a snug fit to the subfloor beneath.
Some might be tempted to skip the mortar step if the manufacturer suggests it's optional. But bear in mind, especially with acrylic or fiberglass units, that the weight of standing users can lead to flexing or cracking over time without solid support.
Avoid these mortar bed blunders:
- Using too much or too little mortar
- Allowing the mortar to dry out before the pan is installed
- Applying unevenly, creating air pockets underneath
Spread mortar evenly with a trowel, then gently press the pan into place. Ensure complete contact with the mortar before weight-bearing. Waiting for full cure (usually 24 hours) is crucial before proceeding with tiling or sealing.
Failing to Waterproof Around the Pan Edges
Many homeowners assume the shower pan alone provides complete waterproofing. However, water can still sneak behind walls and fixture seams if transitions aren't properly sealed.
Waterproofing is not only about protection from splashes. It acts as a defense against long-term seepage that can compromise the wall cavity or framing beneath.
Best practices include:
- Applying a waterproof membrane or sealant tape above the curb and around the perimeter
- Caulking joints where pan edges meet the wall
- Overlapping wall waterproofing sheets/barricades with the pan flange
In humid areas or older homes prone to moisture, additional sealing may be required. Taking these extra precautions protects against steady hidden leaks no matter how attractive the finish may look on the surface.
Rushing the Installation Timeline
We get it—renovation projects are messy and time-sensitive. But when it comes to shower pan installation, rushing the process often means redoing it later entirely. Adhesives, mortar beds, and sealants all have specific cure times and conditions, and skipping the patience step will almost always come back to bite.
Avoid premature timelines by:
- Reading the product manual line by line—every pan and brand is a little different
- Allowing sealants and underlayment to cure completely
- Not walking on the pan or tiling until timelines are met
Remember that moisture damage doesn’t always show right away. Taking extra time now means avoiding repair costs, mold removals, and even full shower gut jobs later.
Ignoring Manufacturer Guidelines
Even experienced DIYers fall into the trap of thinking their method will work better than the manual’s. But each shower pan comes with manufacturer-specific guidelines tailored to the materials used.
Manufacturers will often point out specific types of backer boards, waterproof membranes, adhesives, and installation sequences that are compatible with their systems. Not following their guide could even void your product warranty.
Take note of:
- Maximum allowable gap tolerances
- Installation sequence (some pans are installed before framing)
- Limitations on cleaning or finishing products
Following directions to the letter can seem tedious, but it's your best insurance against future failure—and a way to gain peace of mind.
Inadequate Slope Toward the Drain
Shower pans must slope toward the drain efficiently to move water out quickly. An improper slope not only leads to puddles but also encourages slippery surfaces and the growth of mildew.
Industry recommendations typically call for a slope of 1/4 inch per foot toward the drain. This creates enough incline to promote effective drainage without feeling awkward underfoot.
Miscalculations often occur when:
- Tiling over pans without adjusting slope geometry
- Reusing existing subfloors that aren’t properly remodeled
- DIY users eyeball slope rather than measuring
Hiring or consulting a professional if unsure about correct grading techniques can be the difference between a dependable shower or a string of maintenance hassles.
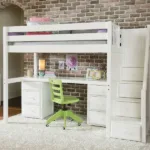
For creative spaces where style meets function, consider adding ideas like a loft bed with desk solution for compact rooms to optimize both comfort and layout.
Forgetting to Test the Installation Before Use
The final mistake, and one that's surprisingly common, is skipping the water test. Once installation is completed, many are eager to finish their bathroom, add final touches, and jump into that first shower. But that first use could be the silent start of a slow leak that builds over time.
A flood or leak test usually involves plugging the drain and filling the pan with water, then waiting 24 hours to check for drops in volume. If water levels go down or wall seepage appears, adjustments need to be made before it's officially in use.
This test allows you to:
- Confirm there are no pinhole leaks or caulking fails
- Monitor sealant effectiveness under pressure
- Identify weak areas in sloping or edges
Once passed, you can move on to grouting, tiling, and installing fixtures with confidence that your foundation is secure.
Final Thoughts
A well-installed shower pan is the unsung hero of a watertight and welcoming bathroom. Avoiding these common shower pan installation mistakes can save you thousands in remediation and deliver many years of worry-free use. Whether you are revamping your personal sanctuary or updating a family bath, preparation and attention to detail must always be at the front of your checklist.
Take your time, follow every step with care, and don’t hesitate to reach out to a professional when things seem unclear. For more home inspiration, perhaps you’ll also enjoy exploring microcement trend for modern interiors as a stylish, durable alternative for bathrooms and wet zones.
After all, no one wants to redo tomorrow what they could have done right today—especially not with water problems involved.